How to create and edit appointment status types
The Patient Appointment Status List is available with PatientNow Essentials. To upgrade your account, please contact our Sales Team at 800.436.3150 or sales@patientnow.com.
The Client Appointment Progress Screen is used to track and communicate every step of your client's treatment process to your staff, nurses, and doctors.
Through the Appointment Status List, you can create or edit personalized statuses that suit your Med Spa!
☑️ How to Enable the Begin Service Window
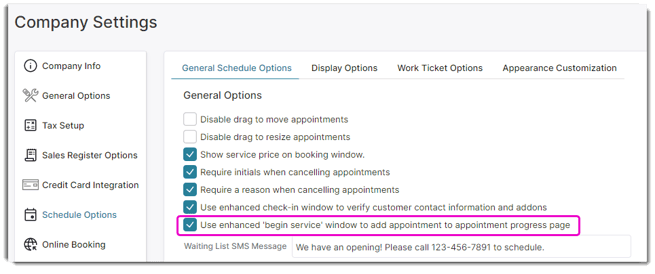
In order to have access to this feature on your calendar, you must enable the Begin Service option in your Company Settings:
- Open Company Settings, then select Schedule Options.
- Under the General Schedule Options tab you will see the 🔲Use enhanced 'begin service' window to add appointment to appointment progress page checkbox.
This box must be selected in order for this feature to properly function.
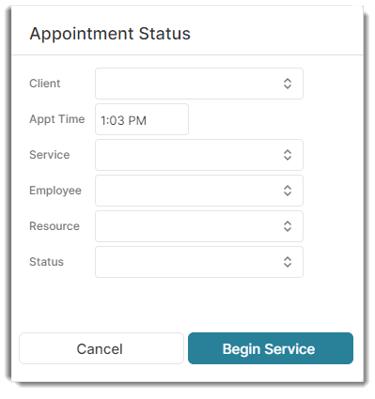
Please note: If you do not enable this in Company Settings, you will have to manually add clients using the Add Client To List button in the Client Appointment Progress screen:
![]()

📅 How to Create and Edit Appointment Status Types
First, open the Appointment Status Types list by hovering over Schedule from the main toolbar. Next, hover over Schedule Options and click on Appointment Status List.
Schedule > Schedule Options > Appointment Status List
Once you're in the Appointment Status List, select Add Appointment Status.
Simply type the Appointment Status name and select the text color you want to appear on your Client Appointment Progress Screen.
You can also modify the status title or text color at any point in time. Just select the status you wish to edit and click on Edit Selected Item (or just double click on the status name).
To learn how to use the Client Appointment Progress feature, click here!
