Learn how to book an appointment on the Appointment Calendar
The Appointment Calendar is one of the most essential pages for your business, as it is one of the main ways to schedule appointments for your clients. 💇♀️💆♀️
Click to navigate through the different tabs in your Book Appointment window:
📅 Appointments
This tab is your main window to book and schedule your client's appointment. To schedule an appointment:
- Hover over Schedule on the Menu Bar and click on Appointment to open the Appointment Calendar.
Schedule > Appointments - Using the small calendar to the left of the appointment screen, click on the day you want to book your appointment.
- Double-click the time slot under the Employee that you wish to book. This will open the booking screen:
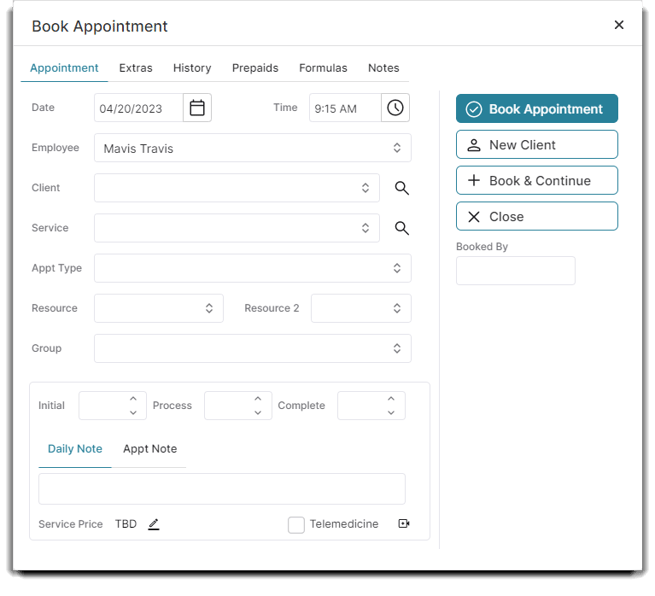
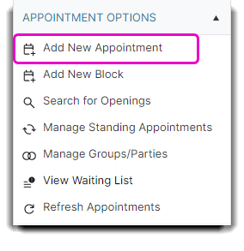
💡 Helpful Tip: You can also click Add a New Appointment in the Appointment Options Menu to open the booking window:
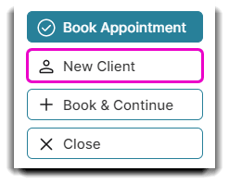
5. Enter the client's name. If the client is not in your program, select the New Client button and enter their information.
6. Choose the requested service.
7. Verify the Resource, Appointment Type, and Service Times.
8. Enter any Notes for the appointment.
10. Select Book Appointment when you are finished! If you want to book another service directly after this one for the same client and employee, select Book & Continue.
💡 Helpful Tips:
Service Times
The additional tab is created if you want to add more time to a client's service/appointment. You can also add a note in the Notes section for any other information that might be necessary.

Daily Notes: These notes will only appear when you are booking an appointment for that particular client only for that day
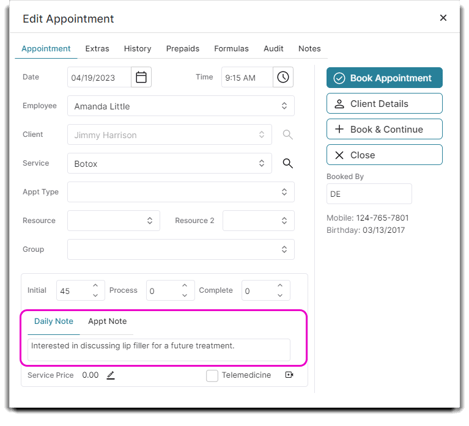
Appt Notes: These notes will only appear for this appointment only for this client only.
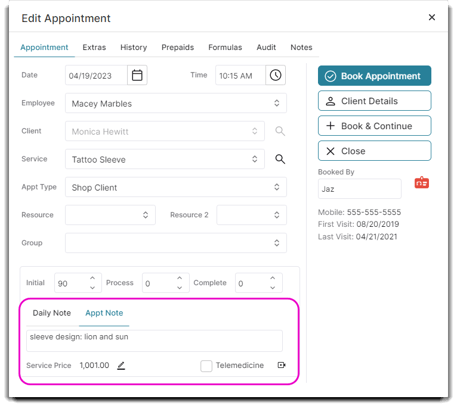
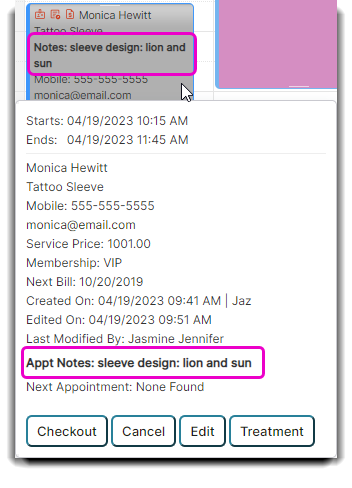
Notes entered into the Daily Note or Appt Note section will appear on your Appointment Calendar Tool Tips (when you hover over the appointment). These notes will not save to your Client's next appointment.
Booking Source: You can also view your Client's Booking Source (API, Google, Online Booking, My Dash, Envision) when you hover over the Appointment.
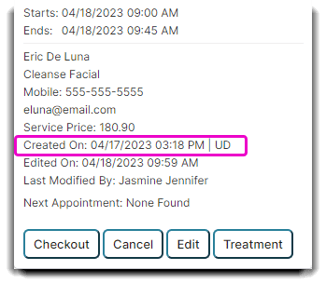
You can use a Booking Source as a filter on the Appointment by Client, Appointment by Employee, and Appointment by Date Range Reports.
✨ Extras
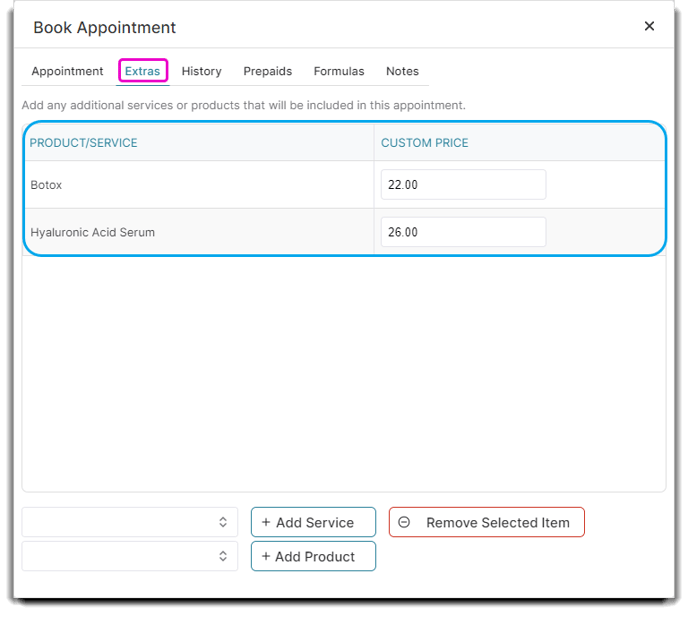
You can add any additional services or products that will be included in a client's appointment here. You can also create a custom price if necessary by entering it in the box.
📑 History
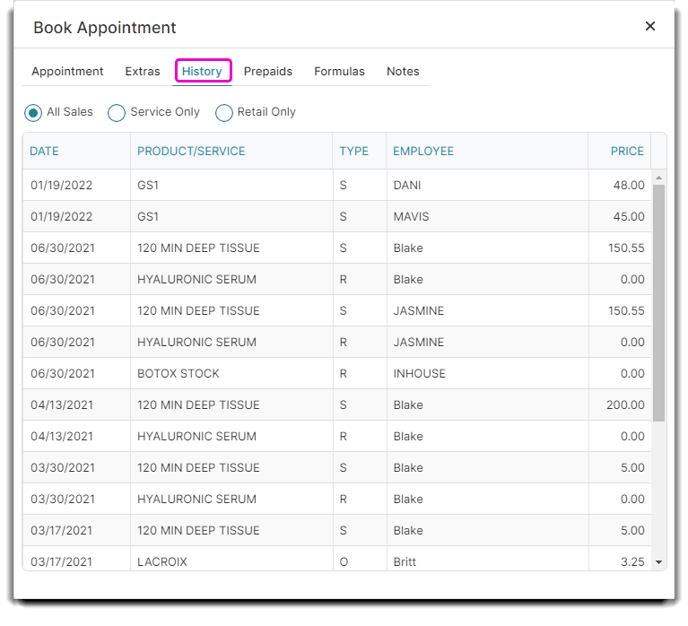
If a client tells you they want to book the same thing as last time, the history tab is the place to go!
Here you can view a client's previous services, including the date of the service and the employee who performed the service, and the total price.
💰 Prepaids
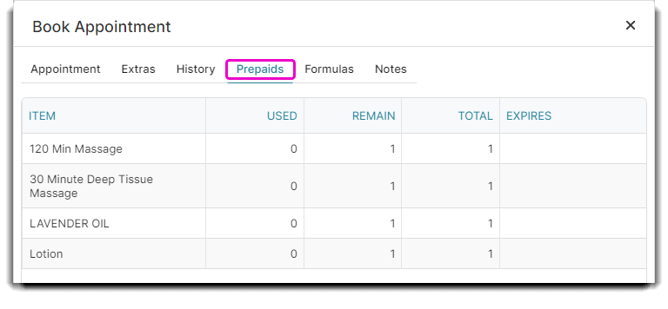
The Prepaids tab is to show any prepaid services a client has remaining and their expiration date. You can easily navigate how many prepaids have been used and the total.
🔢 Formulas
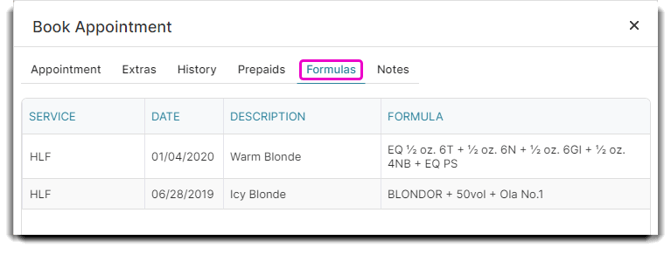
The Formulas tab shows all formulas saved for the selected client.
✏️ Notes
The notes tab lets you create a new note for the client booking an appointment, and shows you any previous notes that have been made for the client selected.
To view these you must have a client selected in the appointment tab or you will receive this popup:

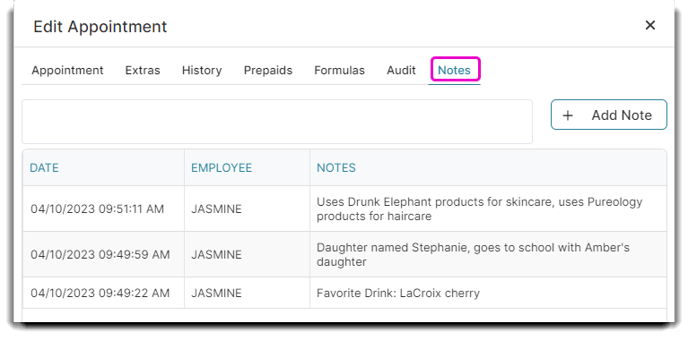
These notes will be stored forever in the client's profile until deleted.
If you want to learn how to book a Group, click here!
