How to create and check out last minute appointment bookings
Last Minute Appointments are a great tool to use when you have recent appointment cancellations and want to maximize your schedule.
This feature is located inside the Custom App.
To setup Last Minute Appointments:
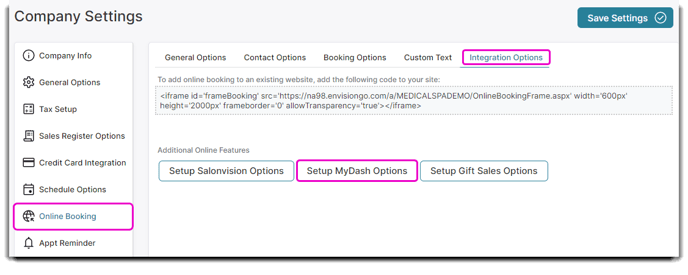
You'll need to access your Custom App settings from your Company Settings.
Click on Setup MyDash Options from the Integrations Options tab in the Online Booking section.
Company Settings > Online Booking > Integration Options > Setup MyDash Options
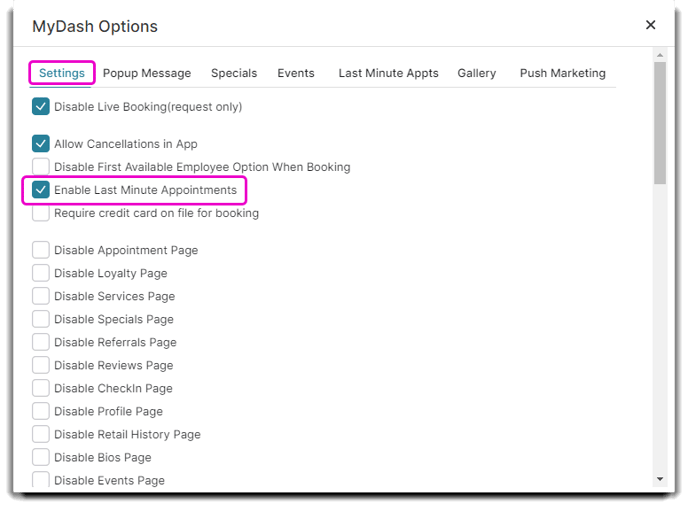
In the settings tab, select ☑️ Enable Last Minute Appointments.
Make sure to scroll down and click Save at the bottom of the window.
How does this work?
When a client goes to book an appointment through your app, the Last Minute Appointments popup window will automatically appear, giving them the option to look through the available time slots.
When they click yes, it will show them all the Last Minute openings you have and the discounts applied to each booking.
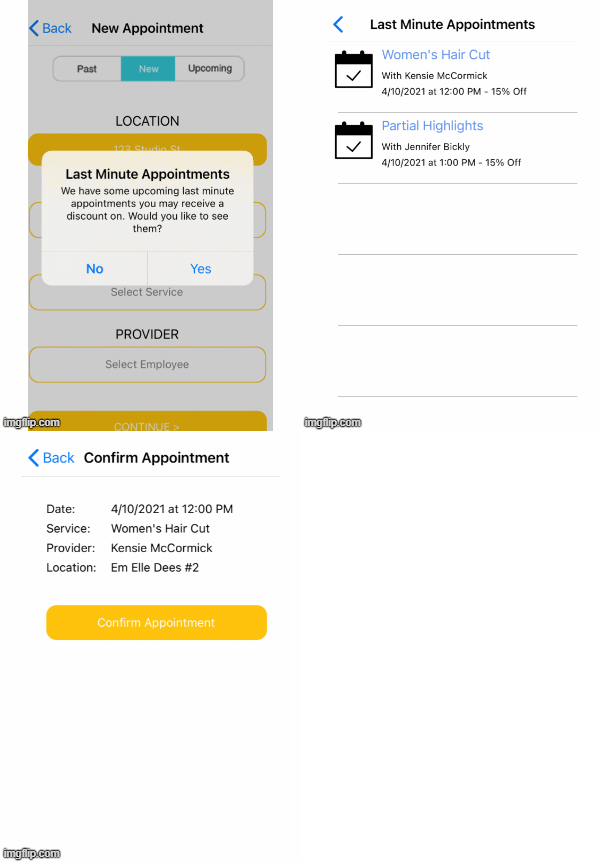
Once booked, the new appointment will show on your appointment calendar.
Please note: The Last Minute Discount percentage has to be manually applied in the Sales Register. Clicking Checkout will not automatically discount their Service Price.
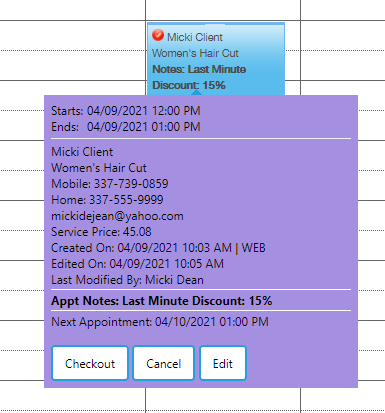
Checking Out a Last Minute Appointment
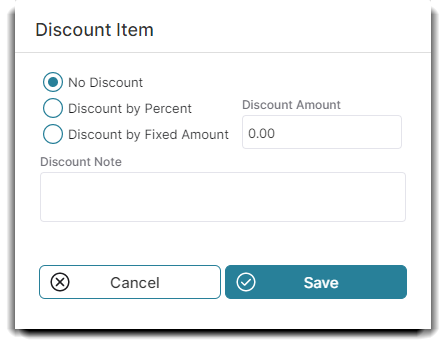
As noted above, you have to manually input your Last Minute Appointment's discount. To do so, checkout the appointment as you normally would. Then select the pencil icon to view the Edit Line Item window. Click on the Discount button at the bottom of the Item Details tab.
Input the Discount percentage you see on the Appointment tool tip and click Save.
Process your Client's payment from the Take Payment screen as usual.
