How to add, edit, and use the different kinds of Notes in Envision
Daily Notes
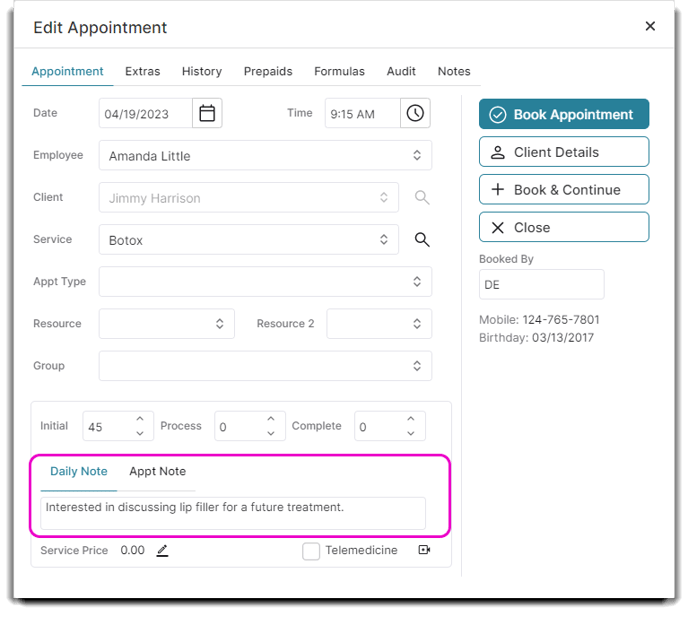
Daily Notes are only stored in the Edit Appointment window for that Client on that specific day. This note will disappear when you book another appointment under the same Client any day after the day the note was created.
You can only edit Daily Notes when double clicking a Client's appointment through the Appointment Screen.
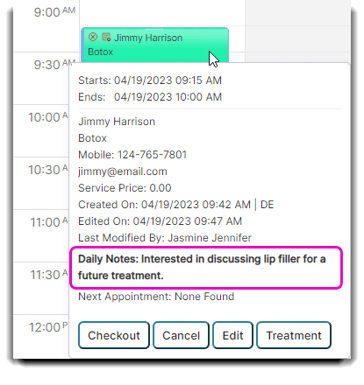
You can also view Daily Notes on the Appointment's Tool Tip:
Appointment Notes
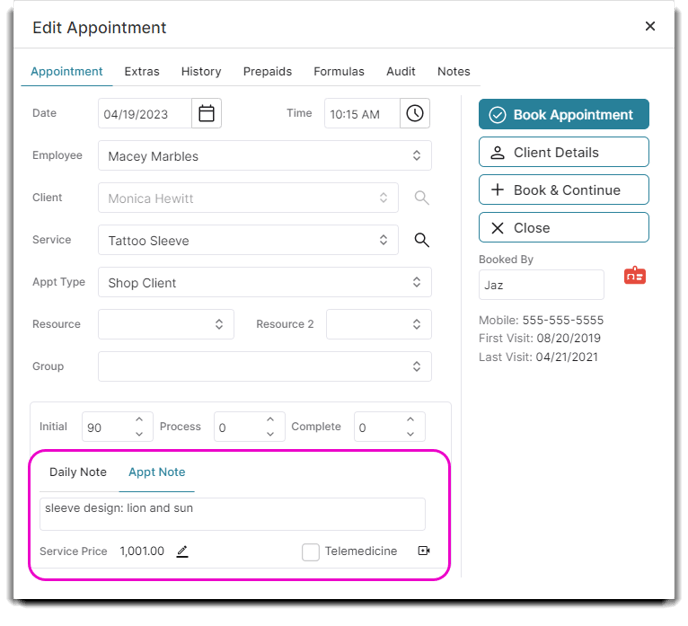
Like Daily Notes, Appointment Notes are edited and stored in the Client's Appointment window. However, the Note will only be stored for that specific appointment (instead of the entire day).
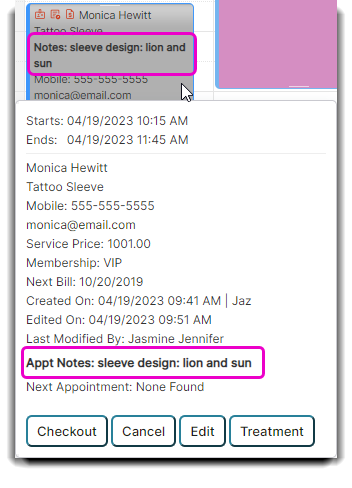
Like Daily Notes, you can view the Appointment Notes when you hover over an Appointment on the appointment's tool tip or on the appointment directly on the calendar:
Client Notes
Client Notes are great to use if you must store permanent information about a Client. These Notes will stay on file unless manually deleted.
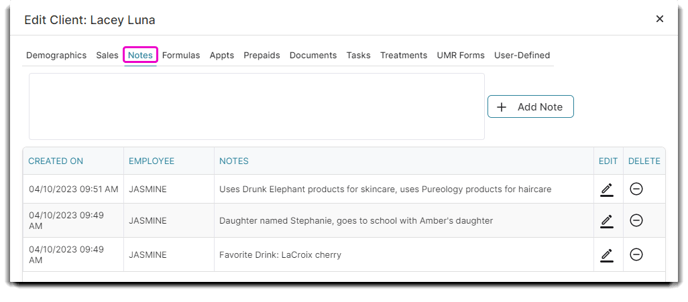
You can add, edit, and remove Client Notes through the Notes tab in the Client's Record.
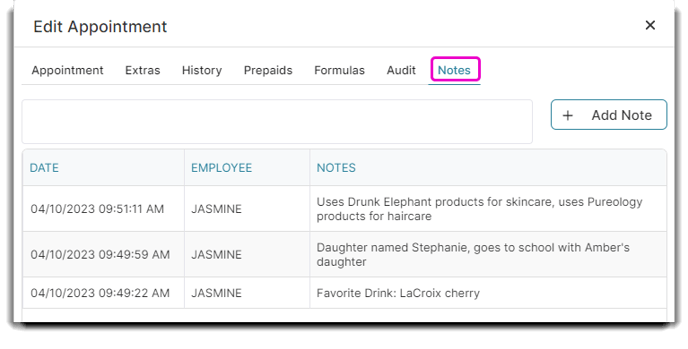
You can also find them in the Notes tab in the Edit Appointment window.
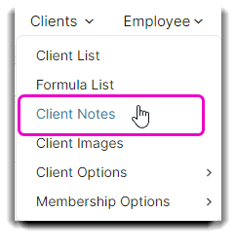
If you have the Ultimate Edition of Envision, Client Notes are made even easier! Ultimate users can create Client Notes through their Client Notes menu option. To access, hover over Clients in the main tool bar and select Client Notes.
Clients > Client Notes
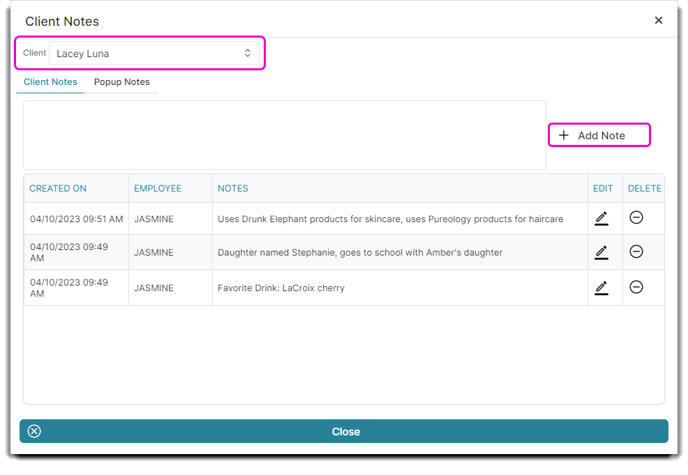
Quickly view, add, or edit Notes when you select a Client's name from the dropdown!
The Client Notes menu feature is available in the Ultimate edition of the Envision program. To upgrade, please contact our Sales Team at 800.231.9445 or sales@ennoview.com.
Popup Notes
Popup Notes are added, edited, and permanently stored in the Client's Record unless deleted manually. These Notes will Popup when you select to book their appointment or process their payment at Check Out.
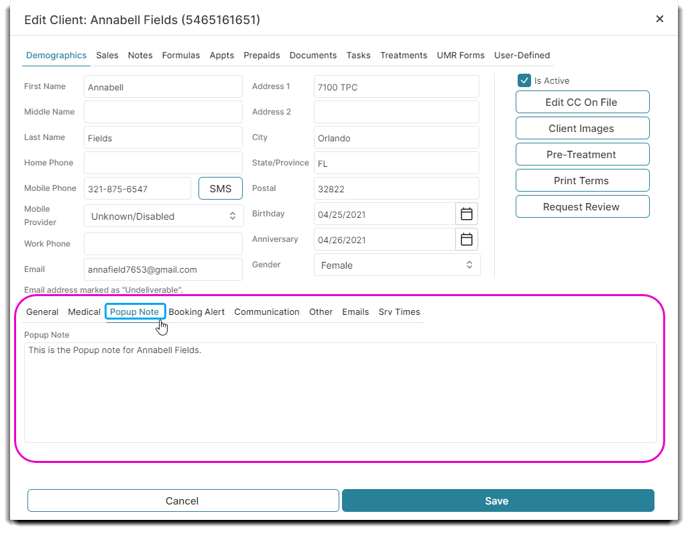
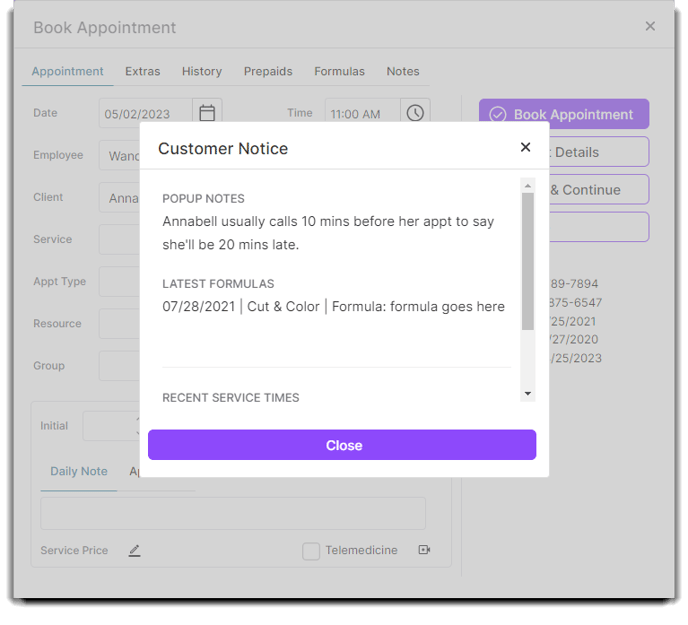
Below is an example of the popup note on the Sales Register when checking a client out who has a popup note.
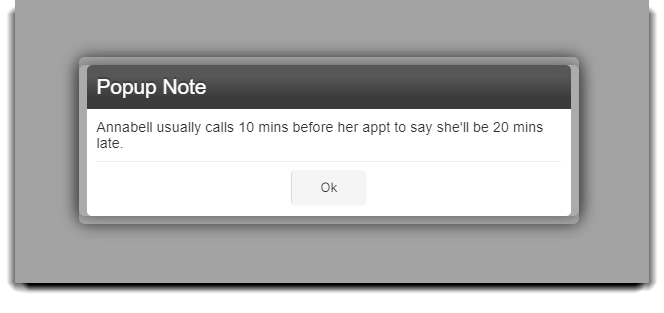
You can reopen the popup note in the Sales Register when you click on the notepad icon next to your Client's name.
![]()
If you are an Ultimate user, you can also quickly create Popup Notes from the Client Notes section! Just click on the Popup Notes tab and select the Client you wish to create the Popup Note for.
Client > Client Notes
Select a client from the dropdown list by typing in their name. You can select either Client Notes or Popup Notes and update them from this screen.

Note: You can only store one Popup Note per Client.
The Client Notes menu feature is available in the Ultimate edition of the Envision program. To upgrade, please contact our Sales Team at 800.231.9445 or sales@ennoview.com.
Service Popup Notes
Service Popup Notes are a great tool to remind Employees of important information when they book a Client for a particular service.
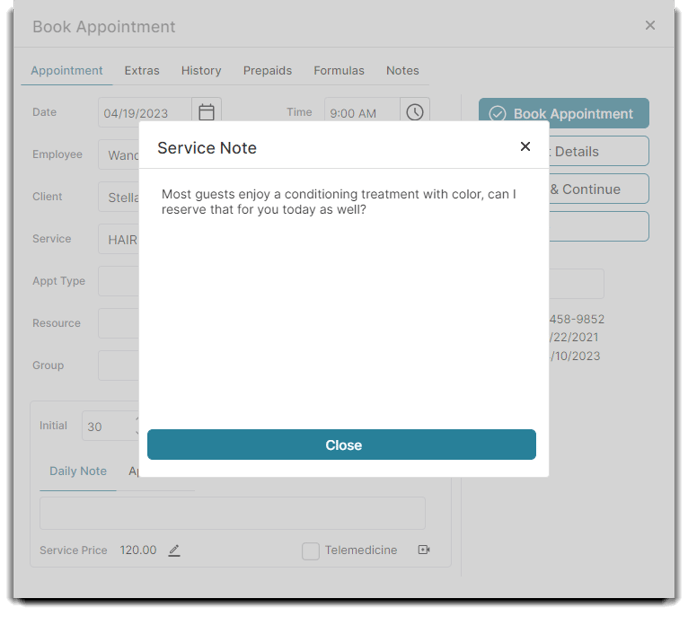
Note: In order for Service Popup Notes to appear when scheduling, you must select the ☑️ Show service popup notes when booking checkbox in your Company Settings.
Company Settings > Schedule Options > General Schedule Options
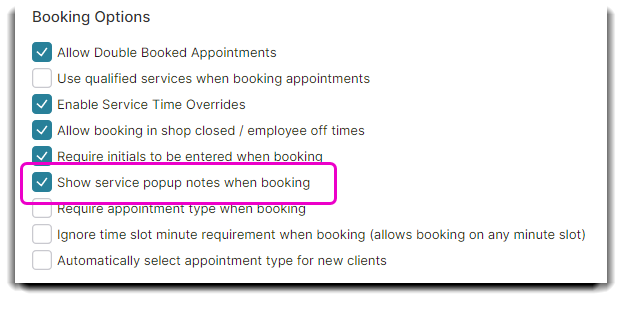
Service Popup Notes are added, edited, and stored in the Edit Service Item window:
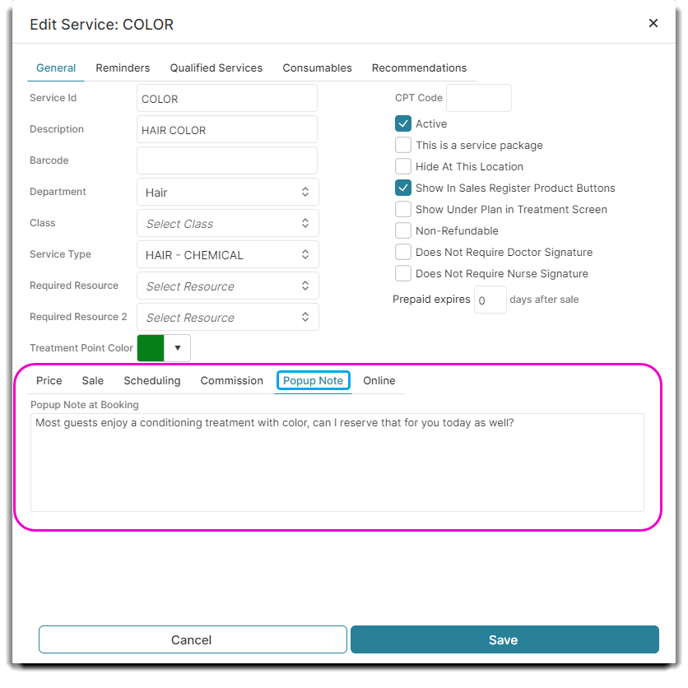
Once you've adjusted your Company Settings and created the Note, it will Popup whenever an Employee tries to book the Service:

Booking Alerts
Appointment Booking Alerts are used to notify, prohibit, or restrict Employees from booking a Client's appointment.
The Appointment Booking Alerts feature is available in the Ultimate edition of the Envision program. To upgrade, please contact our Sales Team at 800.231.9445 or sales@ennoview.com.
The Reason Note field allows you to input an explanation for the Booking Alert. If a client is set to Deny All Booking, they will be unable to book online.
To Create a Booking Alert:
1. Click to edit a Client from the Client List in the Clients main dropdown menu.
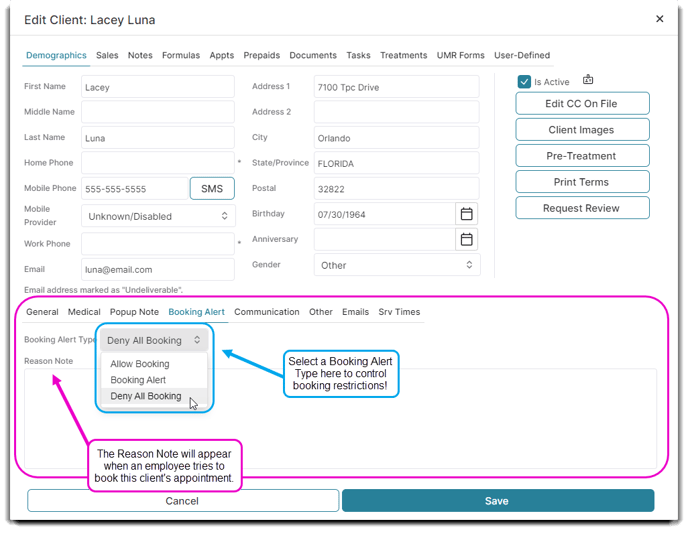
2. Select a Booking Alert Type to control booking restrictions. Then, add a Reason Note (in the example below, we use "2 no shows!").
If the Client has a Booking Alert, a caution sign icon will popup along with the Reason Note when an Employee tries to book their appointment. If you choose Deny All Booking, a red stop sign will appear instead of the caution icon.
Note: You can bypass a red stop sign by exiting out of the popup and continuing booking.
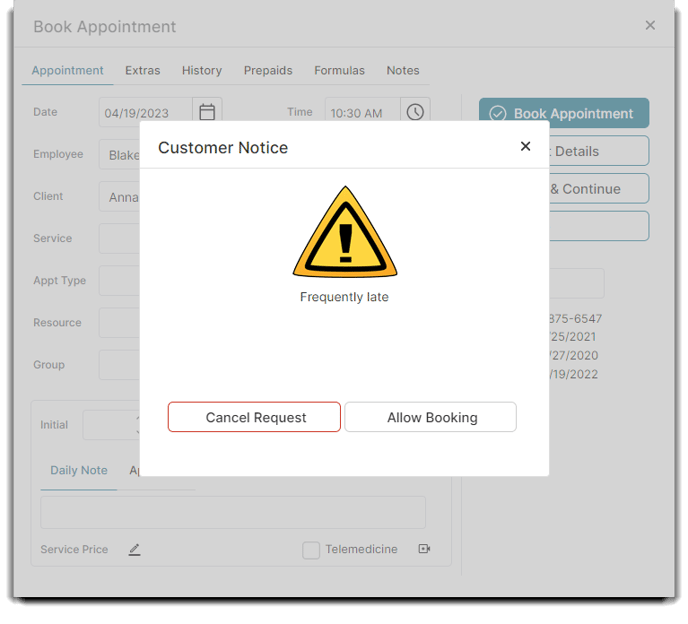
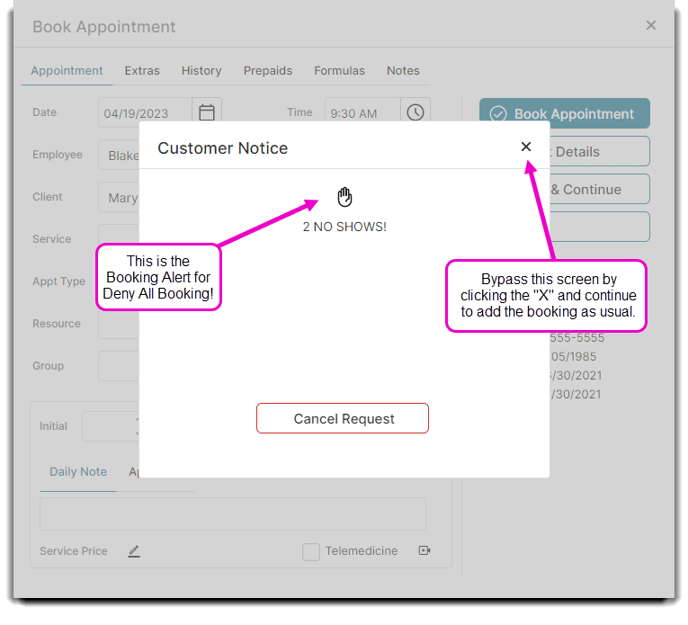
This feature makes it easier to prohibit or restrict certain clients from booking appointments.
Note: When the feature is set to Allow Booking, Booking Alerts will not appear. If you want to Allow Booking but still include an alert when scheduling the Client's appointment, use a Popup Note instead.

