
A detailed summary of the Take Payment Screen options
You will be able to check out clients and process payments on the Sales Register Screen. Once you set up the client details and retail or service items, you can take payments by selecting the Take Payments button at the bottom right corner of the Sales Register.
Once selected, a popup screen will prompt you to determine the payment type(s) to process the client's payment. For mobile payments, please refer to this page.
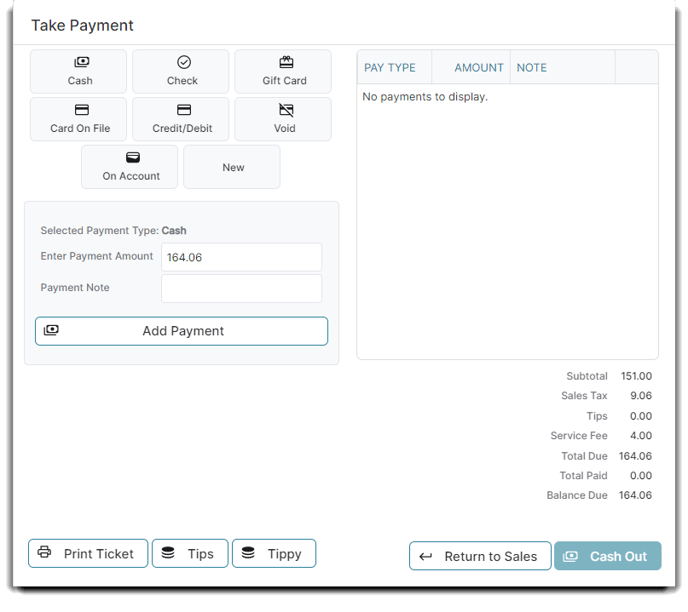
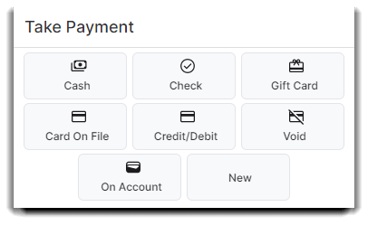
Payment Method Buttons
Click one of these buttons to select the method of payment. The screen will display differently depending upon which method you select. For example, if you select any Credit Card method you will be prompted to process the card (if you have integrated processing). If you select Gift Card, you'll be asked for the Gift Card number.
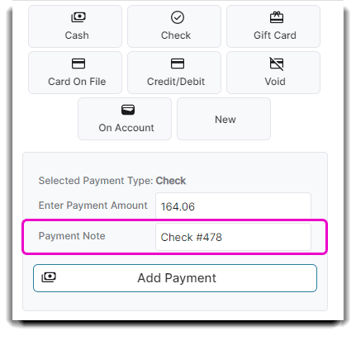
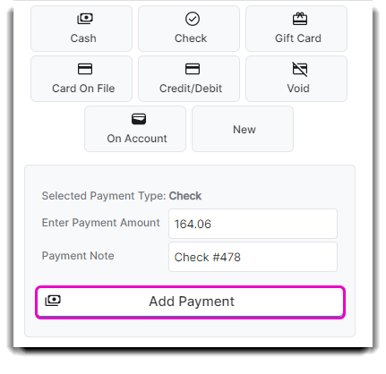
If you are selecting the payment type of Check or any of the Other payment types, you can add a note within Note field to input information (like the check number) below the Amount on the payment screen.
Other Payment Types
You can create and show up to 8 payment types named Other 1, Other 2, etc. These optional types can be named and enabled to show in the Company Settings.
Print Ticket
Click the Print Ticket button if you would like to print a "Pre-Receipt" for the transaction. This can be useful if the client is paying with a credit card and you do not feel comfortable asking them if they would like to put a tip on the card.

Clicking the Print Ticket button will print a receipt with a tip line so that the client can write the tip amount on the receipt and you can enter this before processing their card. The credit card information and authorization number will not be printed on this receipt because the card has not been processed yet.
Tips
Click the Tips button to add a tip to the payment. Some clients might want to pay for their service, products, and tips altogether. You can do this by selecting Tips.

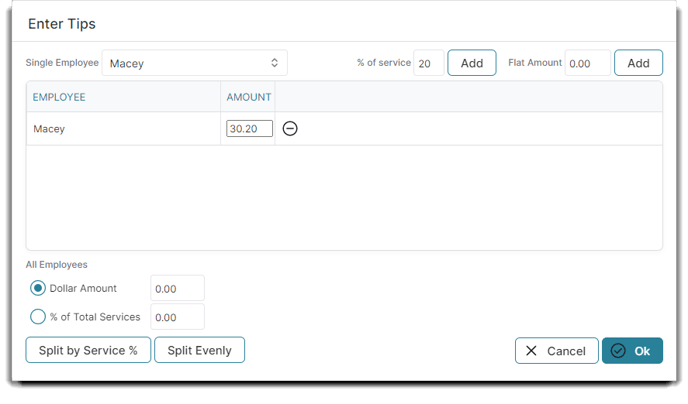
When you Enter Tips, you have the ability to tip a Single Employee or ALL employees that were included for a client's services. If you wish to tip a single employee, find the employee in the Single Employee drop-down menu.
% of service
You can tip an employee based on the % of service by entering the percentage in this box. A client might say tip "20%" you would then enter 20 in the box and click Add.
Flat Amount
You can also tip a Flat Amount if a client gives you an even number instead of a percentage. Enter the flat amount the client says in the box and click Add.
All Employees: Dollar Amount
This option is if you want to tip all employees who have worked on a service. You can enter in a dollar amount that will be split evenly or split by service %. These two options are just below the box.
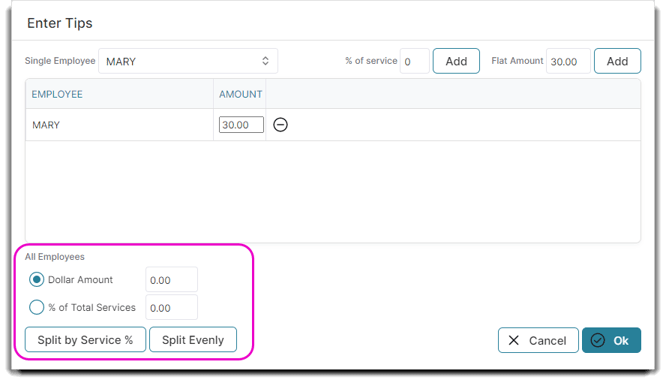
All Employees: % of Total Services
This option is if you want to tip all employees who have worked on a service. You can enter a percentage that will take the percent of total services a client had done. You can enter in a percentage and split by service % (this is helpful if one service was longer than another and vice versa) or everything can be split evenly.
If you are looking for more information about Tips, check out this article.
Add Payment
The program has the ability to split a payment between multiple methods. Select a payment method and enter the amount that the client will be paying with the first payment type then select Add Payment. Repeat this process for any additional payment methods until the entire balance amount due is accounted for.
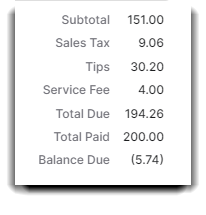
Total Due / Balance Due
This will display the total amount due for the sale. The balance will display the total that hasn't been accounted for with a payment. If the balance due displays a total in parentheses ( ) it means that there is change due back to the customer.
Payment List (Right Side)
The list of payments that have been collected to settle the balance due. Depending on the method of payment, additional notes can be entered next to the amount. The button will remove a method of payment from the list.
Return to Sales
Click this button if you need to make changes to the invoice before collecting payment.
![]()
Cash out
Click this button to complete the sales transaction and save the sale into your records. Once you click this button, you'll be prompted with the following screen displaying receipt and screen options.
![]()
Receipt Options
Any change or tips will be listed at the top of the popup. You can move onto a new ticket by selecting the first button in the left column. You can also email the receipt to the client by selecting Email Receipt.
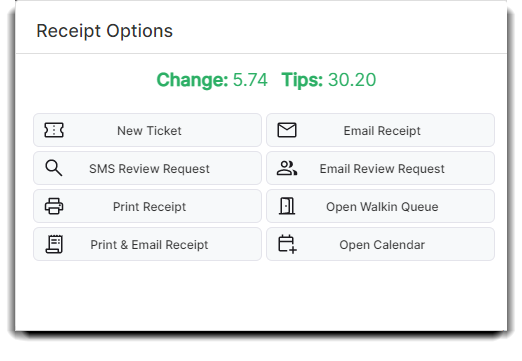
You can send your client a SMS review request and/or a email review request. After a client has cashed out, you can send an Email or SMS (if you have paid SMS features) prompting a client to review their services. If you would like to know more about the review request, check out this article.
You may choose to print a receipt, email a copy of the receipt, or both print and email the receipt to the client.
Note: An email address must be entered on the client profile in order for the business to email the client a receipt. There are options to disable emailing receipts in the Company Settings.
The last two buttons on the right column will return you to the screen you select. For example, clicking Open Calendar will return you to the appointment calendar screen or Open Walk In Queue will take you to the manage walk-ins screen.